Floor Refinishing - 8 Steps to a Great Looking Hardwood Floor

The Professionals use techniques and skills for hardwood floor refinishing that can be acquired by anyone. So, Floor Refinishing can be accomplished by the homeowner in a very professional manner. Apply the following 8 methods and you should be on the road to less costly great looking hardwood floors in your home.

hardwood floor refinishing tips


  1. The number one key to success is preparation. Proper Preparation is the most important key to achieving a nice looking floor. When sanding the old finish with a power belt sander, be sure and sand in the direction of the grain and remove all old stain completely over the entire floor. Start and stop marks will cause unsightly marks on your floor once the stain is applied, so avoid them like the plague. Be sure and feather sand areas that need it. This helps eliminate a splotchy appearance, by allowing a more even absorption of stain.
  2. With floor refinishing, thorough clean up is crucial. Proper clean up is also where a lot of people go wrong. Once you have sanded all the old stain and varnish from the wood, you have to remove even the tiniest particles of dust and debris from the floor and cracks. Vacuum the floor thoroughly and use a crevice tool to help lift dust and debris from cracks and crevices. After vacuuming thoroughly, use a tack cloth on all areas of the floor. The tack cloth will remove more debris that the vacuum cleaner can't remove. Many people make the mistake of forgoing this step. Don't forget this extremely important step. It will help you achieve a clean mirror smooth surface without the trash in your finish.
  3. Limit air flow in the room. Once you have cleaned the room you will need to stop dust from getting to your work area and to do that you have to stop the air flow. Stop air infiltration by closing all windows, doors, and heating and air vents. Keep all people and pets out of the room as they will track small particles of dust and hair onto the floor. Normal air flow should be resumed only after you have stained the wood, and the final coat of varnished applied to the floor has had time to dry to touch. Floor refinishing requires patients, so don’t rush this drying period or you will end up with trash in your floors new finish.
  4. Apply a wood conditioner before applying stain. Wood conditioners even out the absorption of stain in wood. This will give you a more even appearance with less of that splotchy look.
  5. Control the temperature in the room within the limits specified on the product labels. This will effect drying time of the products. Too hot or too cold can cause streaking, crawling and film formation problems.
  6. Stir the stain thoroughly before applying. If you have several gallons or quarts of stain, then box them all together so that your stain is uniform. Furthermore, remember that the solids in stains settle to the bottom of the can. It's real important to stir the stain very well making sure the solids are no longer settled to the bottom of the cans. Otherwise, your stain color will not be accurate. Floor refinishing is all about keeping particles off the floor and out of the finish you are applying.
  7. Pour your top coat finish through a strainer before using. Pouring the top coat finish through a cone strainer into a clean five gallon pail will remove any solid finish particles from the top coat finish product prior to application.
  8. Apply the top coat to a minimum of 3 mils thick. Two coats usually will achieve this and will also leave a more uniform sheen.
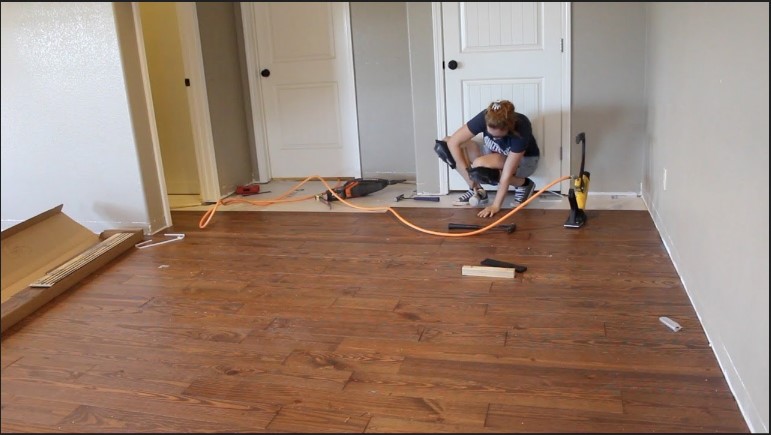
You must allow adequate time for the finish to cure before allowing any traffic. Cure time is usually 2 to 3 weeks. So be careful how you slide furniture or objects across the uncured floor. You don’t want to negate all the hard work you put into floor refinishing.

Comments

Popular posts from this blog

Advantages and disadvantages of living in a block of flats

When we think about big city architecture, one of our first thoughts is a multi-story apartment building. Since the 1950s, the blocks have become a permanent element of the landscape of smaller and larger cities. Buying an apartment in such a building still turns out to be the goal of a large group of investors, as evidenced by, for example, subsequent projects sold out on the trunk. In this post, we check the biggest advantages and disadvantages of living in a block of flats. The most characteristic element of metropolitan architecture Apartments in a block of flats are a relatively new invention. The first apartment blocks were built before the Second World War. The most characteristic representative of this type of construction are blocks made of large slabs, which still dominate the largest Polish cities. From the technical point of view, buildings are quite crude, especially by today's standards, for years they have been and still are home for a large group of people. Resident...

14 Inspirational Design for Residential Space

 Each new year means new trends. The choice of colors, style and various small details of the interior design change. Awareness of new trends is very useful if we intend to sell our house or flat - implementing them can really increase the value of our property. Of course, this does not mean that you should use them blindly - not everything can be done and sometimes something can be avoided instead of being forced. However, it is definitely worth being aware of the latest trends. # 1. An Island in the Kitchen If you have a large enough kitchen - an island where you can prepare drinks and meals will be perfect in this case. It is very fashionable to choose a contrasting color. source : Regan Baker Design # 2. Contrasting color refrigerator Another fashionable trend is refrigerators, in a quite expressive color, contrasting to the rest of the kitchen. source:  Yale Appliance Blo # 3. Marble Countertops The marble top is very durable, it looks very elegant, and it is also very ea...

Taking Proper Care Of A Paint Brush - How to

It's amazing how poorly people treat their paint brushes. I've been in the painting business for over 25 years and during that time I have seen some funny looking brushes. However, when you are paying $25 to $50 dollars for a quality brush, then brush abuse is no laughing matter. Poor care of your paint brush will drastically shorten its life. Described below are some procedures that a house painter or homeowner should follow when using, cleaning and storing brushes. First you need to consider the type paint you are going to be using before choosing your brush. Will you be using oil or latex paint? Do you know if you should use a Nylon or a Nylon Polyester mix, or China Bristle brush for the paint you have purchased? Always use the right brush for the type of paint you are going to use. Never use a Nylon brush in oil base paint. If you use a Nylon brush in oil paint, the oils and chemicals in the paint will permanently change how the brush bristles feel. ...